
 |
ISSIGraph help |
6. Change color and alpha blending
In order to instantiate ISSIGraph you must select the icon with the name issigraph:
![]() This name is followed by .exe in Windows operating system.
This name is followed by .exe in Windows operating system.
If you are using Linux or Mac OS X, the application name is followed by no extension. Then, double-click mouse right button to open ISSIGraph. It's also possible to open the application using the command line. Just type issigrap.exe in Windows or ./issigraph in Linux or Mac OS X.
After executing ISSIGraph you will find the following window:
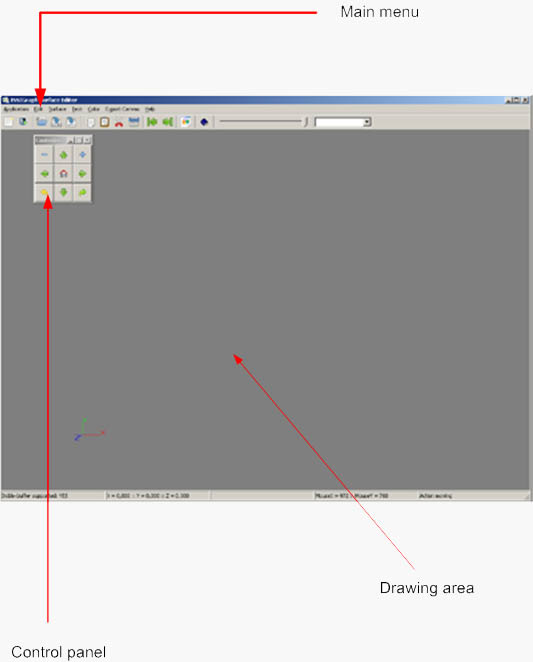
Figure 2.1

Figure 2.2
First off, you should select the option NURBS in Surface menu option. After clicking on it, a new NURBS surface is created in the center of the drawing area as an empty red selector.
The next step is clicking right on the mouse right button to add a new control point.
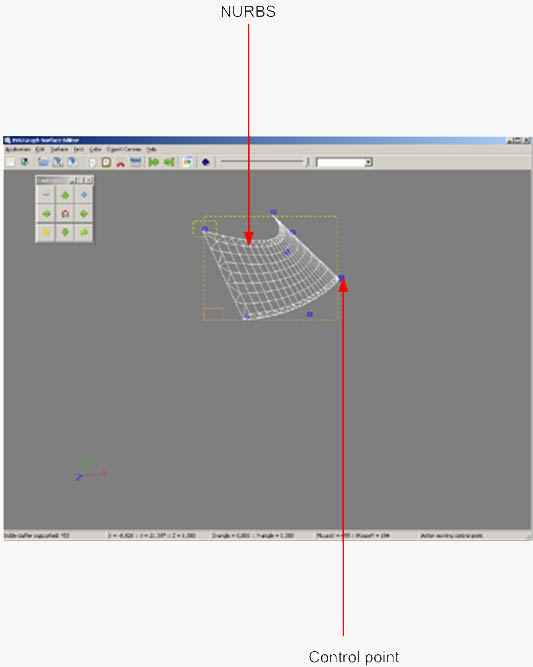
Figure 2.3
The blue square represent a control point. It's possible to create NURBS with up to 32 control points.
Control points can be deleted either by pressing either the "DEL key" or selecting a control point and bringing up the context menu using the mouse right button:
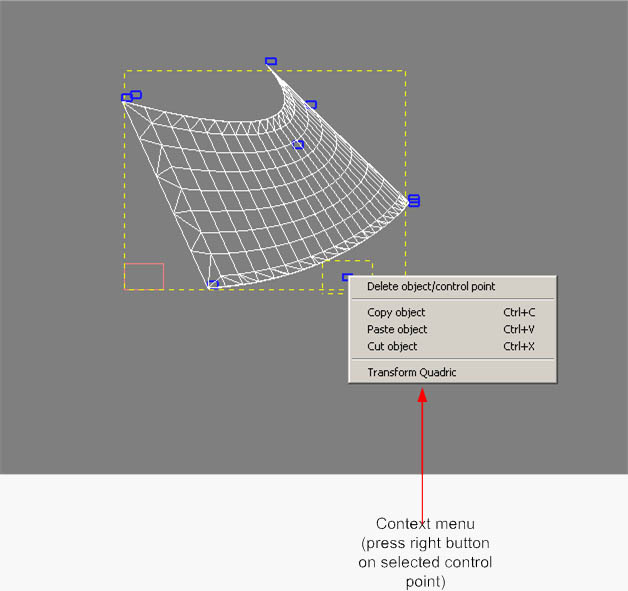
Figure 2.4
Control points can be moved and dragged across the drawing area by selecting them.
Beziers can be added to the drawing area in the same way as Nurbs. Just select Surface in the menu bar and then click on Bezier:
A new Bezier surface will be created:
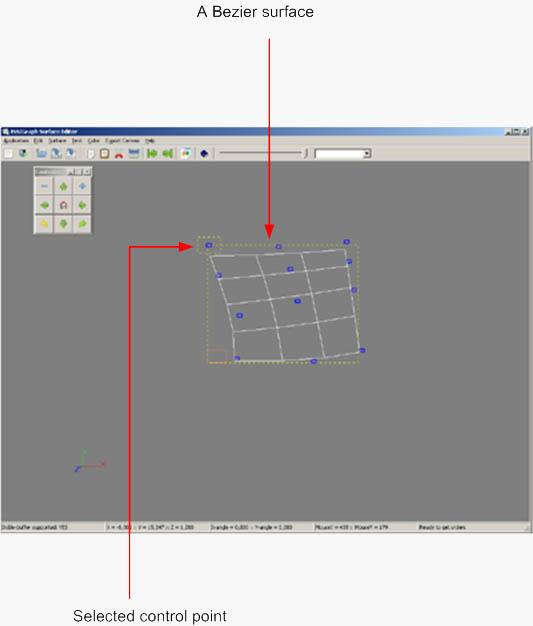
Figure 2.5
There are several types of quadrics. The implemented ones are:
and solids:
In order to add a new quadric or solid into the drawing surface you must select Surface in the menu bar and then select any of the available quadric or solids:
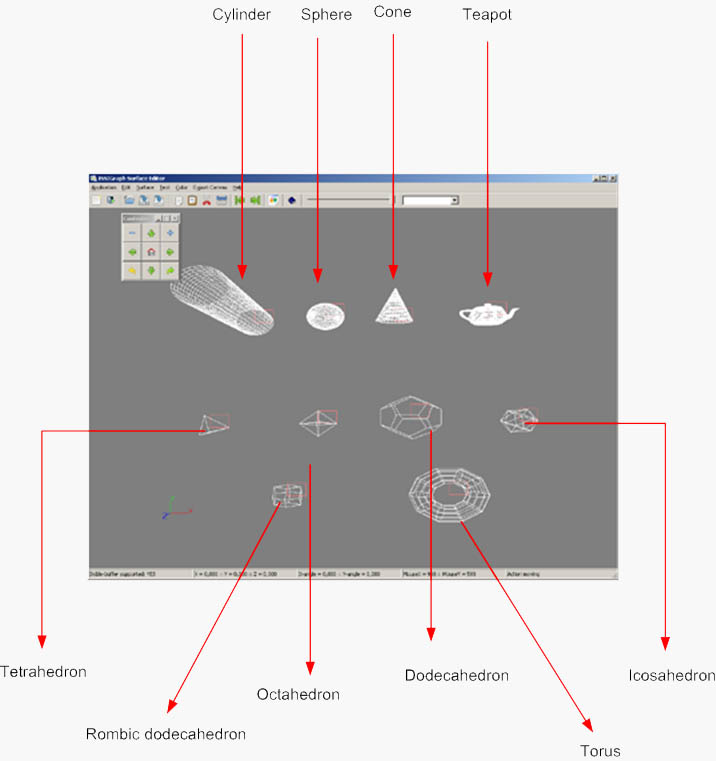
Figure 2.6
You may add 3D text by selecting the Text option in the menu bar and then typing the text to render:
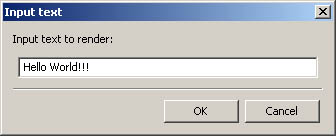
Figure 2.7
After pressing OK, the result will be:

Figure 2.8
Selectors are used to select, drag and move the corresponding surface or object. Selectors are depicted as red squares near the 3D objects:
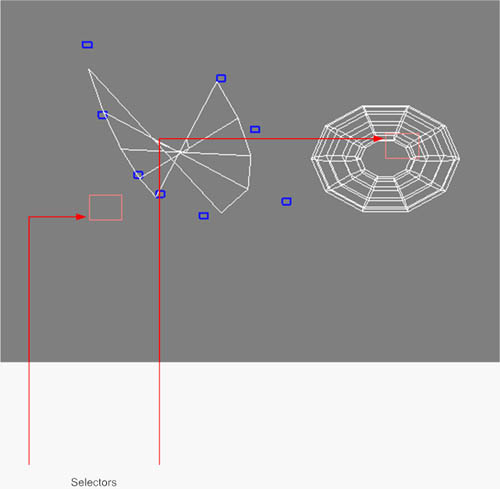
Figure 3.1
Clicking on them, you will be able to select, move or drag the 3D objects.
The scene is focused in the center of the screen; however, using the controller it is possible to move the virtual window in all directions.

Figure 4.1

Using the controller it is possible to move the scene accross the virtual space.
Figure 4.2
Changing quadric dimensions is as easy as selecting the object and pressing the mouse right button. The follwing context menu will appear:

Figure 5.1
Then move the mouse to change dimensions. To finish edition click on the mouse right button again.
6. Change color and alpha blending
To change the color of a 3D object in ISSIGraph, select the icon "Change color" in figure 2.2 and select the corresponding color.
If you want to change the alpha blending, move the slider in the control bar in the figure 2.2 right or left to increase or decrease the alpha channel transparency.
The edit menu can be accessed in two ways. The first one is selecting the Edit menu in the bottom menu bar; the second is accessing the context menu as shown in figure 5.1. Just click on the mouse right button when an object is selected to bring up the context menu.
To copy an object to the ISSIGraph internal memory, just press Ctrl + C or use the context menu when the object is selected. Remarks: The object will not be copied into the system clipboard.
To paste an object from ISSIGraph internal memory, just press Ctrl + V to transfer data to the screen. Remarks: See 7.1 Copy for more details.
Cut will delete the object and transfer it to the ISSIgraph internal memory by pressing Ctrl + X. After this, you will be able to paste it again. Reemarks: See 7.1 Copy for more details.
With the edit menu it is possible to delete any 3D object (except the coordinate axis). Just press the trash icon to delete it.
You can rotate 3D objects with ISSIGraph by pressing the left or right arrows to spin in Y-direction and the up or down arrows to spin in X-direction as shown below:
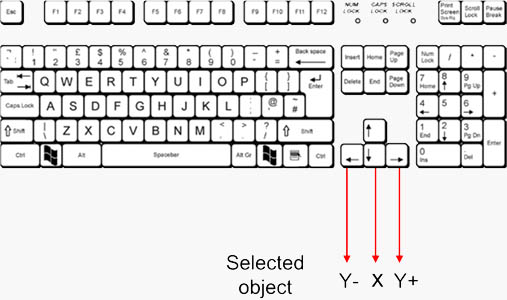
Figure 8.1
It's possible to rotate the whole scene by pressing the keypad keys 8 or 2 to rotate the scene in X-direction and keypad keys 4 or 6 to rotate the scene in Y-direction as shown below:
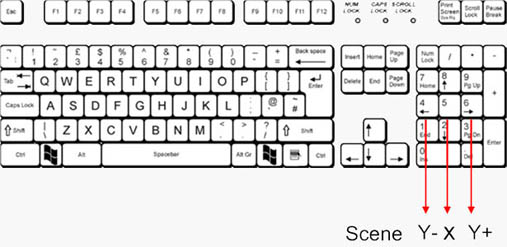
Figure 8.2
Canvas can be exported by pressing the menu option "Export canvas" and selecting an image file format. Available formats are: JPEG, PNG (both with 100% of quality) and BMP.

Remarks: The background color will be replaced with the black color RGB(0,0,0) in BMP.
Figure 8.3
ISSIGraph allows you to save its 3D contents to a XML structured file. For this purpose, you must select the "Load" option in the Application menu as shown in figure 2.2 in order to load a file. Remarks: When a file is loaded, the previous screen contents will be lost.
In the same way, if you want to save or save as a XML file, you must click on "Save as" or "Save" in the Application menu as shown in figure 2.2. Remarks: To use "Save" you must have used "Load" or "Save as" previously.
As in common applications, ISSIGraph allows you to undo the last movement of an object in a screen: for this, just press "Undo" in the Edit menu. See figure 2.2 (Undo) .
It's possible to redo the last movement by clicking on "Redo" in the Edit menu. See figure 2.2 (Redo).
Remarks: Undo and Redo only store one step or movement.
To open a new session just press on "New" in the Application menu or just press Ctrl + N. Remarks: Note that the main window (the first on displayed) must not be closed, otherwise all the child windows will be closed.
To close the application just press on the X sign on the bottom left/right of the window or just press "Close" in the Application menu as shown in figure 2.2.